Creating a Jira Discovery Project: Part 1 - Setting Up Essential Fields | #60
Jira Product Discovery is great, and you should try it out if you can. Here's why you should use it and how you can create your own project from scratch, with all the fields you need to get started.
I love Jira Product Discovery (JPD). It fits in so well with everything I am very familiar with in Jira and Confluence, and with the new features the team are delivering in quick succession it just amplifies why this product is the fastest growing product Atlassian has ever had.
If you are like me, and you like to quickly change and tweak the way you discover or deliver products to try and find out the best way that works for your team, then you should really get the free trial and see for yourself.
You can set up your own private Jira/JPD instance for free, and you get three users (sign up link here). You are limited on the free plan of Jira for certain things (no initiatives, Jira Advanced roadmaps etc), but it seems most, if not all of the JPD features are currently available in the free tier.
This series of guides I’m providing will give you every instruction you need to get from the very beginning of an empty discovery project, to a fully functional product roadmapping tool that is directly integrated into your Jira delivery system.
You will also be able to use some of my other blogs listed above to create the perfect little ecosystem for product delivery.
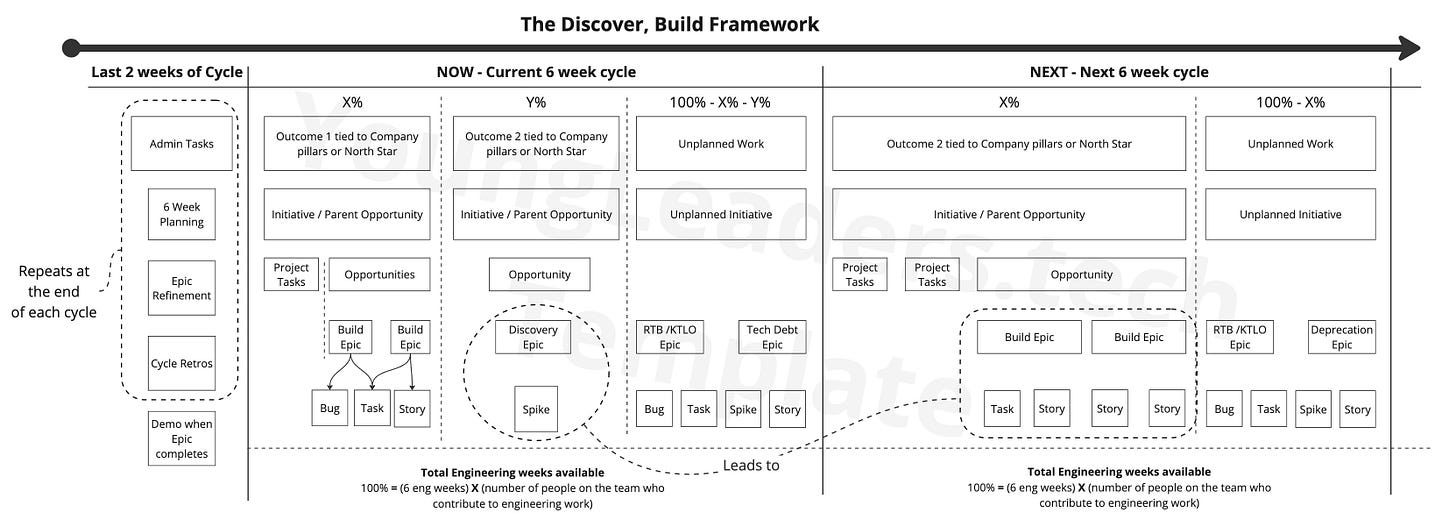
I call it The Discover, Build Framework.
This framework has been a labor of love, and I am very proud of it. This series serves as your first official intro to it.
In essence, the framework encourages you separate the discovery from the actual building of the opportunity in question. This removes a lot of ambiguity around delivery dates, gives you a backlog of epics to pick up on short notice, and allows you to practice continuous discovery and delivery in your product teams. Here’s a sneak peak of the process you can choose to follow when you complete this guide.
I’ve been writing this framework for almost 3 years now, and have been writing this guide for well over a year, simply because I just wasn’t happy that my framework was in its ‘final state’. I don’t think it will ever actually in it’s final state, or else I wouldn’t be learning anymore, but it’s in a state where I’m now happy to share.
What took me so long?
To be honest, the dating aspect of my tickets (actual/target start/end) was the biggest area I was struggling with. That was until JPD released a feature in the past weeks that allows you to take the dates from Jira for your delivery epics, and this was the missing piece I was waiting for.
Now I can remove all my clunky dating automations in Jira, and strip back all my tickets in Jira to just the Start and Due date, which can either be automatically assigned by sprints or generated by automation with the the start/end of 6 week cycles, or when the epic/initiative moves into in-progress.
Product Managers have too much to do, and too often date fields are too complicated to keep on top of. Automating this aspect has the best benefit to a company, for high level visibility of product delivery plans. Keeping leadership informed autonomously and off your back is critical to your own sanity in a fast moving environment.
I had the pleasure of chatting their Head of Product Tanguy Crusson a couple of months ago, as my team was the first to pilot the product here at Toast. Toast was one of their original Lighthouse users, so we were giving our feedback on the functionality that was available at the time.
All of the blocking issues I raised on the call were either fixed since we were talking, or are already in Beta. I was very impressed by this.
Side note: Listen to Tanguy on Lennys Podcast. It’s a really entertaining episode!
Now, it’s time to stop talking and and get to the doing.
How to set up your own Discovery Project
This blog assumes you are the admin for your JPD instance. I’ll mention parts where you must be an admin to do certain actions, but since I am an admin, I may have missed sections you can’t follow.
Certain other tasks must be completed by an Atlassian admin in your company, like global fields. If you don’t have this access you can just create local fields.
You don’t have to be a Jira admin to use this once it is created, but you will if you want to follow this guide.
First, delete almost everything
First things first, delete everything. (Feature request for anyone from JPD??)
This is the only point in time where you know someone else hasn’t added or is using a field for anything. So nuke as much as you can.
Delete (almost) all of the boards, all the views, and all the fields you can. The only boards you can keep if you want are the All Ideas, and the Product roadmap one - this is already configured similar to how I would tell you to anyways.
I’m keeping these purely for the description in the “About this view” as it seems pretty accurate. I’ve added Soon, but we’ll get to that later.
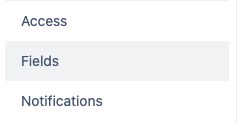
To delete a field, go to Project settings → Fields.
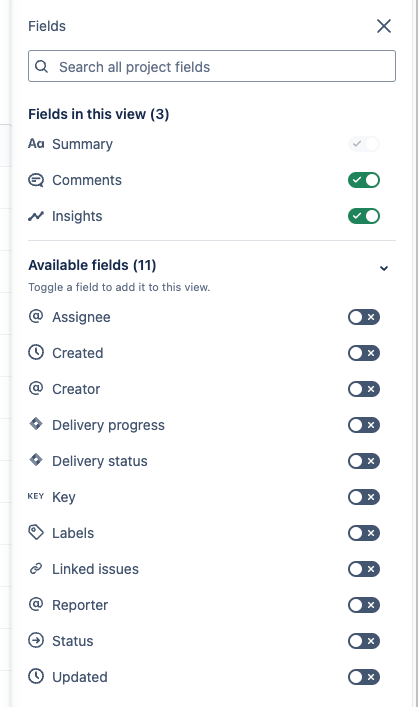
You can also do it in your all ideas view, hit the fields filter at the top
I would suggest deleting even the fields you think you are going to use. Its super easy to create new fields, so don’t keep any bloat at the start.
You won’t be able to delete the ones that are important.
This is tedious, but important and you only have to do it once. This is the list of fields you currently cannot delete (as of 17 Apr 2024)
Creating Fields
Next, we need to create the fields we’re going to use as part of our discovery and build process. There are a few ways to add fields. You can also add a field just for your project, or a global field, that is shared across many projects.
Global Fields
I’ll show you the Global field creation, as you’ll most likely want to create these first fields so all your projects can use them.
Global fields was just released a couple of months ago, and is an important improvement to fix a pretty annoying problem. Any field you create in JPD will be visible in automations and JQL in regular Jira, so when lots of people were adding multiple ‘Team’ fields, it was causing problems when you were trying to find out which field was yours.
Go to Field page in Project settings again, and you’ll see the two Global fields options (if you have permissions to create them).
If you only see Add global field, it means you don’t have access to create global fields, but you can add fields created by admins on your JPD instance. Contact the admin and send them this guide. Give them the link to this header to make your and their life easier!
Hit the Global fields and the global fields settings will open in a new tab.
On this screen below, you can do it by hitting the Fields filter and
Go back into the field screen and hit the Create a new field button on the bottom right
In general, it’s nice to add relevant emojis to the options or the select menus as well as choosing different colours for the options, it looks better on the board.
Fun tip: Use chat GPT to suggest what emoji and colour to use. Replace the bold with your options
I want a single emoji and a colour for my Jira discovery field. It is a select field called Team, and the option I want the emoji for is called Fintech.
With that in mind, here are the fields I am using currently, and the bare minimum you need to create to follow the most important parts of this guide.
For each field below, you can copy and paste the content in the block quotes (like this paragraph) into the description of new field as you are creating them. This will make it easy to refer to and understand quickly how to use the field.
I’ve also added the Emoji name in the description and options settings, so you can find the one I have in my screenshot more quickly when looking for it in Jira.
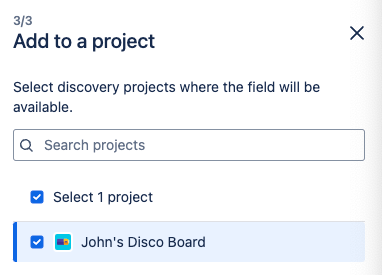
When adding global fields, you can add them to a project in the final step. You should only add them to your own first, before rolling out to other boards. Refine it with a small audience originally, and only then, when you are happy with the options, should you roll it out to other projects.
Team
You're most likely to want to manage multiple teams in this board so you should create a team field.
Name: Team
Emoji: Busts in Silhouette 👥
Type: Select (Don't do a multi-select as that would be more appropriate for a ‘dependent team‘ field)
Options: Add your options. As mentioned above, choose an emoji, but also choose a colour. What colour doesn’t matter, just make all the options different. It’s easier to see on the views.
This field identifies the team responsible for this task, opportunity, initiative or milestone. It helps in assigning accountability, tracking progress, and ensuring clear communication within the organisation.
Idea Type
Jira discovery has loads of potential uses, so you need to have an idea type field that splits those use cases. This field should be filled out for every idea input into the board, as it will be the base filter you will use on most views.
Also, once the hierarchy functionality is released, I suspect this idea type will integrate nicely with that. Here is an Image Tanguy gave me for this guide that shows how the hierarchy feature looks on a timeline:
One thing to note, I have added an Outcome Idea type here as an option, which I will merge with the Outcome field further down the page once the hierarchy changes are released. I need both the field and the option at the moment.
Name: Idea Type
Emoji: Light Bulb 💡
Type: Select - Hard rule here. 1 idea type per Idea. Automations will use this field for branching.
Options (in this order)
Initiative 🌐 (Globe, Purple)
Milestone 🌠 (Shooting star, Brown)
Opportunity 🔍 (Left Magnifying, Green)
Project Task 📌 (Pushpin, Blue)
Admin Task 🔧 (Wrench, Grey)
Highlight rows with this colour: Yes
The idea type.
Initiative 🌐
Broader than a single opportunity, this represents a series of related tasks or challenges that collectively aim towards a significant goal, often culminating in an initiative or a project.
Example: Improving the overall user experience for the tool by conducting user research, implementing design changes, and conducting usability testing.Milestone 🌠
Significant points or achievements in a project timeline. Will likely be a collection of opportunities and project tasks.
Example: Completing the first phase of a new software rollout or completing an OKR milestone.Opportunity 🔍
This refers to a single, identifiable challenge or problem that needs solving. It could lead to a project or a specific task in a project, but usually starts as a standalone problem or issue needing attention.
Example: Identifying a bug in the current system that needs fixing, noticing a gap in user feedback that requires a new survey.Project Task 📌
Tasks to be carried out by members of the team, specifically tied to one or multiple projects, features, epics or initiatives. Can be linked to milestones as blockers.
Example: Creating a proposal for a project, updating a stakeholder list, recording a demo.Admin Task 🔧
Tasks to be carried out by members of the team, not necessarily tied to a project. These likely will not have delivery tickets in Jira.
Example: Updating templates, documentation, dashboards or organising a retro.
Roadmap
This is the Now/Next/Soon/Later field used to give general roadmap section of the idea. Another critical field.
The soon is optional, but I find there is a logical gap between next and later, where it fits in nicely when planning. You might also consider a ‘Done‘ roadmap status, but I’ve tried that, and the status field works best for this purpose.
It’s generally a good idea to keep roadmap fields focused on planning and future-oriented stages, while the status field should handle the current state, parking and completion of tasks. This separation helps maintain clarity and distinct roles for each field.
Name: Roadmap
Emoji: Alarm Clock ⏰
Type: Select - Hard rule here. 1 idea type per Idea. Automations will use this field for branching.
Options: (Use the numbers too, it’s easier for sorting and quickly understanding the priority without checking the description.)
1. Now 🔥 (Fire, Light Red)
2. Next ➡️ (Right Arrow, Light Blue)
3. Soon 🔜 (Soon, Yellow)
4. Later ⏳(Hourglass not done, Green)
1. Now 🔥: Immediate actions that require urgent attention and are currently underway. Typically, the current 6-week cycle.
2. Next ➡️: Upcoming tasks that are queued for action following the completion of current priorities. Typically planned for the next 6-week cycle.
3. Soon 🔜: Tasks that are not immediate but will need attention shortly after the next tasks. Generally expected to be addressed within the next couple of quarters.
4. Later⏳: Future tasks scheduled for later consideration with no immediate urgency. These are typically planned for beyond the next quarter.
Opportunity Stage
Opportunities will have 5 stages and this will be tracked using this field
As an opportunity progresses through the roadmap, it should enter most if not all of these stages.
Name: Opportunity Stage
Emoji: Glowing Star 🌟
Type: Select
Options: (Tip, use the numbers - it helps with sorting)
1. Problem definition 🧐 (Monocle, Blue)
2. Spikes & Prototyping 🛠️ (Hammer and Wrench, Purple)
3. Design & Refine 🎨 (Artist Palette, Cyan)
4. Build & Release 🚧 (Construction, Yellow)
5. Post-Release Clean-up & Analysis 🧹 (Broom, Grey)
1. Problem Definition 🧐
The problem definition stage involves identifying the issue, validating its significance, analyzing its impact, and defining success criteria. It ensures the solution aligns with business goals and includes supporting research. At least one epic must be created to proceed.
2. Spikes & Prototyping 🛠️
This stage focuses on choosing a solution path through spikes and POCs, ideally tied to discovery epics if they need to be added to a kanban or scrum board. Follow the guidelines for POC/Spikes, evaluate using RICE (Reach, Impact, Confidence, Estimation(eng weeks)), and propose one solution to move forward.
3. Design & Refine 🎨
Develop the required architectural or UI designs and create a BUILD epic. Add user stories with acceptance criteria and ensure they are linked to relevant epics.
4. Build & Release 🚧
Break the opportunity into milestones and include them in the release plan. Ensure user stories act as the Definition of Done, track discarded stories as new opportunities, and document tech debt. Provide a comprehensive release plan and notes.
5. Post-Release Clean-up & Analysis 🧹
After release, review all previous steps to ensure problem definition and information are accurate. Validate the solution with customers, and track enhancements as new opportunities. Include feedback from discarded user stories.
Opportunity Type
This dictates the size of the piece of work or the problem that needs to be solved. Most companies use similar terminology, so just use whatever is used in your company (S,M,L etc.) Don’t try change how your company names the different sizes of work.
These will be used for filtering the opportunities on your roadmap, and dictating the type of templates and discovery needed for the pieces of work.
Name: Opportunity Type
Emoji: Question Mark ❓
Type: Select
Options:
Boulder 🏔️ (Snow Capped Mountain, Blue)
Rock 🪨 (Rock, Purple)
Pebble ✨ (Sparkles, Cyan)
Note: You might be wondering why I have a Boulder opportunity, and also an Initiative Idea type.
This is intentional, as many companies still require you to report on certain initiatives. Basically, once something needs to be included in bi-weekly reports, I turn it into an initiative idea type. Nothing else really changes.
I have an automation that creates bi-weekly project tasks tied to initiatives with a RAG status template. That’s another future post, and I’ll update this line when I post it.
Opportunity Type - These will dictate the type of templates and discovery needed
Boulder - a full feature that needs to go through full E2E discovery including all information requested on our full discovery template here: ([DISCOVERY TEMPLATE: BOULDER])
Rock - Work that does not require the full barrage of discovery, but a selection of the mandatory and some optional pieces of discovery on the discovery template here: ([DISCOVERY TEMPLATE: ROCK/PEBBLE])
Pebble - A Small piece of work where the problem is easily defined and the outcomes are simple and easy to explain. No optional discovery is required on the discovery template here: ([DISCOVERY TEMPLATE: ROCK/PEBBLE])
Also note: I will share these discovery templates in a future blog. I’ll update this page when I do. They’re currently undergoing a reconstruction to fit my new way of working.
Start Date
This is the date when the idea moves into an ‘In progress‘ status. This can be done with an automation as well, if the idea starts before the date that was input. I’ll cover that automation on a future post.
Name: Start Date
Emoji: Spiral Calendar 🗓️
Type: Date
Options:
Date source: Linked delivery tickets
Date field: Start date
Calculation by: Earliest date
This is the start date, and is when the idea moves to an ‘In Progress’ status, typically during the ‘Now’ phase of the roadmap.
If delivery tickets are being used, the date the first linked delivery ticket transitions to ‘In Progress’ is the last time this field will be updated.
If multiple delivery tickets are linked, the earliest start date of all linked delivery tickets is taken.
Due Date
I’ve gone through multiple choices in how I want this field to be named. End date, launch date, Actual end, etc… In the end, i’ve just decided to follow Jira, and copy what they call their default end date field, which is Due date.
This is the date you expect the idea to complete, or when the idea does actually complete, which can be set by an automation.
Name: Due Date
Emoji: Tear Off Calendar 🗓️
Type: Date
Options:
Date source: Linked delivery tickets
Date field: Due date
Calculation by: Latest date
The due date is when the idea is expected to be completed. Initiatives might start in the ‘Now’ phase of the roadmap but may not finish until a later status.
Ideally, opportunities should be planned to begin and end in the same status.
If delivery tickets are being used, the date the delivery ticket is expected to be completed will be the last time this field gets updated.
Outcome
The outcome that the opportunity is related to should be selected here. New outcomes can be added by PMs where required (this list will grow)
This one could potentially be better as a local field (non-global) as you’ll want to add to this fairly often, and you don’t need outcomes from other teams on your project. I’ll leave that up to you.
Name: Outcome
Emoji: Compass 🧭
Type: Select
Options:
Don’t have any outcomes? Follow my guide here on how to run an outcome ceremony with your team.
Outcomes are specific, measurable achievements that a project aims to accomplish.
They are not simply a list of tasks to be completed; instead, they represent the tangible impact these tasks have on our customers and our business.
Outcomes should directly support the company's strategic goals, north star or pillars and provide clear direction for what success looks like.
Stakeholder Personas
A Persona is a semi-fictional character that represents a user type within a targeted demographic, helping guide decisions about product features, navigation, and the overall user experience.
Have you internal personas already created? They should join the customer personas on your list. Here’s a guide I made on how to go about creating that list.
Name: Stakeholder Personas
Emoji: Performing Arts 🎭
Type: Multi-select
Options: These you should fill out yourself. Use my guide and screenshot to give you inspiration
Please choose all stakeholder personas that are or may be impacted by this idea.
A Persona is a semi-fictional character that represents a user type within a targeted demographic, helping guide decisions about product features, navigation, and the overall user experience.
Reach
The reach is the extent to which an opportunity impacts the team and the organization. Reach is assessed based on how broadly the changes or improvements will affect various groups within the company.
Name: Reach
Emoji: Globe showing 🌍
Type: Select
Options: (Tip, use the numbers - it removes ambiguity when someone doesn’t know if Most > Many. Also, the weight can be set with the icon circled above)
1. Few (red, weight 10)
2. Many (orange, weight 15)
3. Most (Blue, weight 20)
4. All (Green, weight 30)
This field quantifies how far a project or initiative extends, such as how many users, customers or stakeholder it affects or how wide its influence spreads.
Few: Impacts a specific subgroup within the team, such as a department or specialized role.
Many: Affects a significant portion of the team, across multiple departments or functions.
Most: Engages nearly all team members, leaving out very few.
All: Universally affects all internal team members involved with the outcome
NOTE: This should be ➗ 10 if used in a calculation. 1.5 cannot be set as a weight.
Impact
This is the field used to gauge the actual impact of the idea on the outcome or parent opportunity.
Name: Impact
Emoji: Hammer 🔨
Type: Select
Options: (Tip, use the numbers - it helps with sorting)
1. Low (red, weight 5)
2. Medium (orange, weight 10)
3. High (Blue, weight 20)
4. Highest (Green, weight 30)
This is the impact on the objective or outcome in question.
Low: Addresses a problem that causes minor inconveniences or small inefficiencies, with a resolution expected to have a limited positive effect on outcomes.
Medium: Tackles an issue that moderately hinders operations or performance, with a solution likely to lead to noticeable improvements in productivity or satisfaction.
High: Solves a significant problem that substantially impacts performance or outcomes, with a solution expected to greatly enhance efficiency, satisfaction, or revenue.
Highest: Addresses a critical issue that is a major blocker to success or growth; resolving it could transform operations, dramatically increase revenue, or significantly improve strategic positioning.
Reach X Impact Score
Name: Reach X Impact Score
Emoji: Direct hit 🎯
Type: Custom formula field
Expression: ({Reach}*{Impact})/10
The reach and impact should be measured against the selected outcome for parent opportunities/initiatives.
For child opportunities, the reach and impact should be measured against the parent opportunity/initiative.
You can also use reach & impact to prioritise outcomes against the north star or pillars your company has set out.
Children opportunities scores should not be compared to those of a different team. Outcomes and their meanings will change from team to team, so it won’t work to try and compare scores to teams with different outcomes.
MoSCoW Method
This field helps teams focus on delivering the most critical aspects of a project or milestone, ensuring efficient use of resources and time. This can be selected on individual opportunity levels when choosing the most important work in a milestone or project.
Name: MoSCoW
Emoji: Check Mark ✅
Type: Select
Options: (Tip, use the numbers - it helps with sorting)
1. Must Have 🔴 (Red Circle, Red)
2. Should Have 🟠 (Orange Circle, Orange)
3. Could Have 🔵 (Blue Circle, Blue)
4. Won’t have 🚫 (Prohibited, Purple)
MoSCoW Method
The MoSCoW method is a prioritization framework used to help project teams determine the importance of various requirements. It categorizes tasks into four priority levels:
1. Must Have (🔴): Critical requirements that are essential for project or milestone success. Without these, the project or milestone is considered a failure.
2. Should Have (🟠): Important but not critical requirements. These are highly desirable and add significant value but are not essential for immediate success.
3. Could Have (🟢): Nice-to-have requirements. These provide added value but are not necessary for the project or milestone’s core functionality.
4. Won’t Have (🚫): Requirements that are agreed to be least critical or out of scope for the current project or milestone. These can be revisited in future iterations.
This framework helps teams focus on delivering the most critical aspects of a project or milestone, ensuring efficient use of resources and time.
That wasn’t too hard was it?
Hopefully it all makes sense, but please to raise queries with me if you have any.
Once you have all these fields created, you will want to then start assigning them to views and ideas, but i’ve given you enough to follow in this guide, so you’ll just have to follow the next one when you are ready.
For More Tips
I have some other Product Operations content here if you found this useful.
For my past tips check out my past posts on Substack or check out the hashtag #JohnsTipOfTheWeek on LinkedIn.
I’d love if you subscribed! I’m trying to build a bit of a following to try and help folks in the industry and make their jobs a little bit easier.











Exactly what I needed! You know what you need to do, but is very hard to find the "how to do it". Thank you for this "how to".
Love the framework that you have developed, even using the free versions of Jira/Confluence to get things up and running into a full product development roadmap