Understanding Your Stakeholder Journeys With Event Storming | #77
Explore how event storming can uncover pain points, align teams, and clarify workflows, helping you map stakeholder journeys and improve cross-functional collaboration.
Event storming is a technique I first came across a few years ago but had mostly forgotten about until a conversation recently with John Cutler brought it back to mind. Since joining Toast, I’ve been navigating a lot of discovery work around manual stakeholder processes, and I was looking for a way to map a customer journey where complex stakeholder workflows were already in place. John suggested using event storming, and it immediately resonated.
When I revisited the concept, I realised how much my experience in product discovery has changed since I last encountered it. I could clearly see how running a workshop with event storming would deliver significant value, particularly in untangling messy and inefficient workflows and aligning diverse teams.
Note: I’m currently a platform PM, and I refer to my customers as stakeholders. If you’re working with external customers, simply think of “stakeholder” as interchangeable with “customer” in this context. Hopefully, that clears things up!
So, What is Event Storming?
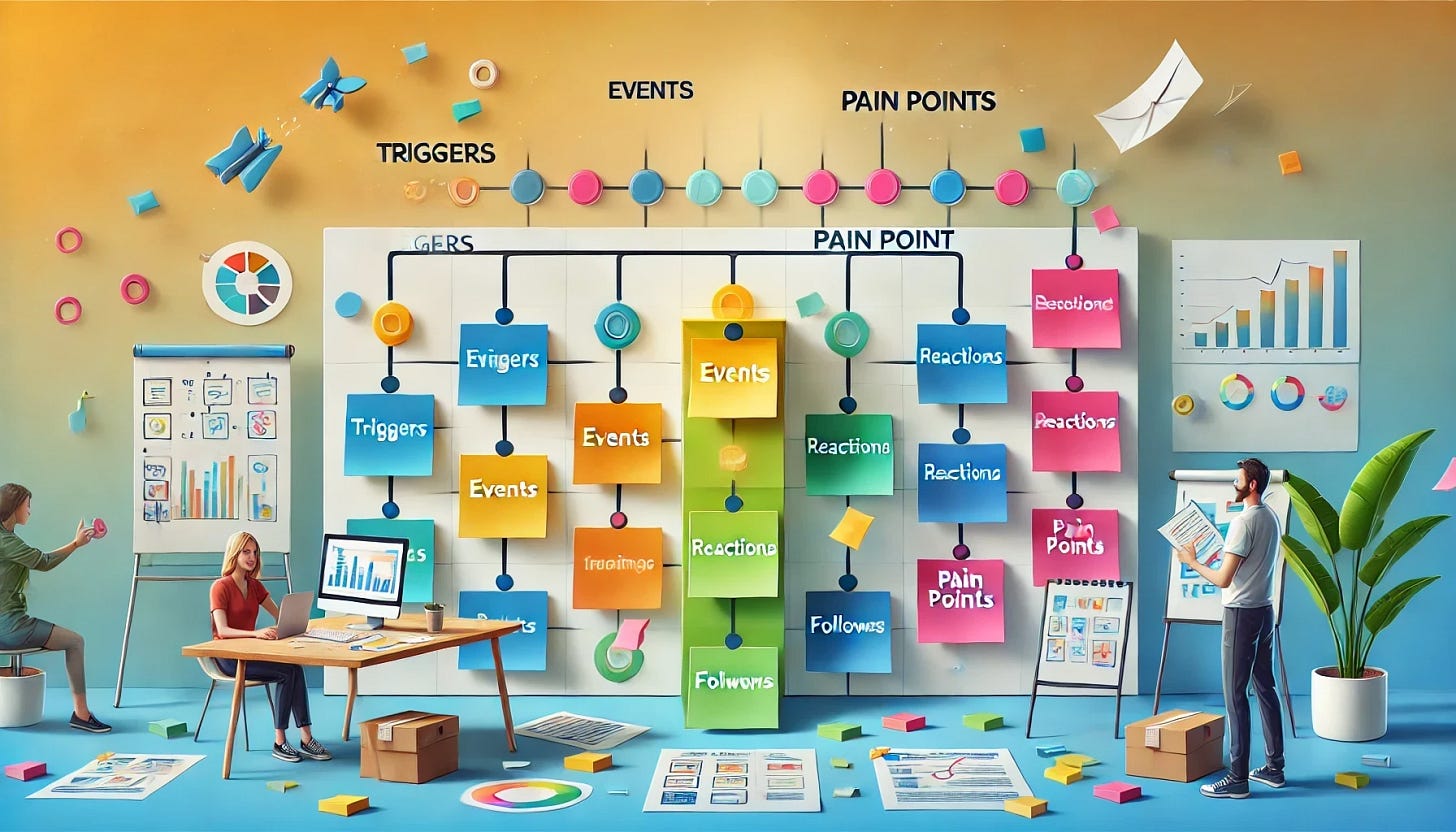
Event storming is a powerful workshop for understanding stakeholder and customer workflows, identifying pain points, and aligning teams across different functions. Originally developed as a collaborative method for designing systems, it has since proven just as effective in product management and operational settings.
By visualising every step in a workflow, teams can capture critical events, uncover triggers, and identify reactions to build a customer journey map while understanding the drivers and associated pain points.
If you’re unfamiliar with customer journeys, I’ve written about them before, so check out this link to get up to speed before diving into event storming.
In this blog, I’ll explore the benefits of event storming and guide you through the structure of a 45-minute workshop. I recently ran this format with some of the stakeholders I support, and it worked really well.
While you could extend the session if needed, the goal is to empower stakeholders to take ownership of updating and refining the board over time - especially as their processes evolve.
I’m a big advocate for consistent documentation updates (there’s a link at the end for more on that), including stuff you have on customer journeys or workflows you have in Miro. The best people to maintain these workflows are the stakeholders themselves - after all, they are the ones doing the actions.
Of course, asking stakeholders to take on this responsibility does add to their workload. It’s important to communicate the value of their effort and, more importantly, follow through on demonstrating that value in tangible ways by fixing some of their pain points.
One of the advantages I have as a platform PM is that my “customers” are internal - people who work in the same company I do. This gives me a direct line to them and makes discovery much faster. We can have candid conversations (most of the time) about the product and its impact, which makes running a session like this significantly easier.
That said, event storming works just as effectively with external customers - it just might require a bit more effort. If you’ve been following my tips and applying them, you should already have systems in place to run this smoothly.
For anyone who’s new, check out the weekly tips in the header (or subscribe!).
Once your stakeholders are familiar with the process - whether after the first session or the third - they’ll appreciate not having to dedicate two full hours or more of their limited time. A well-run, concise session makes the most of everyone’s calendar, which is a win for all involved.
When Should I Run an Event Storming Session?
Where I find I will probably use these most often is when I am about to begin discovery on an upcoming project, and I need to understand what the hell is going on. That was exactly the purpose of the workshop I did recently.
If you are lucky, you might have customer journeys or some sort of visual depiction of the workflow, but a lot of the time you are starting discovery with only a bunch of enablement docs for existing processes and you are trying to visualise the workflows yourselves.
If you don’t have an upcoming project to justify the stakeholder time, you should be able to justify it with continuous improvements as the main goal, towards whatever outcomes you have identified.
You could also ask yourself the following questions. If the answer to any of them is “I don’t know”, or “they haven’t been updated in 3 years” then, it might be time to run this session.
• What are the key events in our workflow, and who’s responsible for them?
• Where are the pain points that create friction or inefficiency in our process?
• Are there gaps or missing steps in our workflow that need to be addressed?
• When was the last time we updated our workflow documentation or validated its accuracy?
If you’re working on a customer journey map, event storming can help bring clarity to areas of uncertainty, ensuring you’re not only representing the ideal customer path but capturing the actual journey as it happens. This approach is especially useful when:
• Updating Outdated Processes: Your existing documentation no longer reflects the reality of your workflows.
• Identifying Systemic Pain Points: There are recurring issues or bottlenecks impacting multiple teams.
• Aligning on Cross-Functional Dependencies: Different teams or stakeholders interact at critical points, and misalignments create operational friction. I hate operational friction, t’s unnecessary, annoying, and, in many cases, entirely preventable.
By using event storming, teams can make sure their understanding is both comprehensive and accurate.
How To Run the Workshop
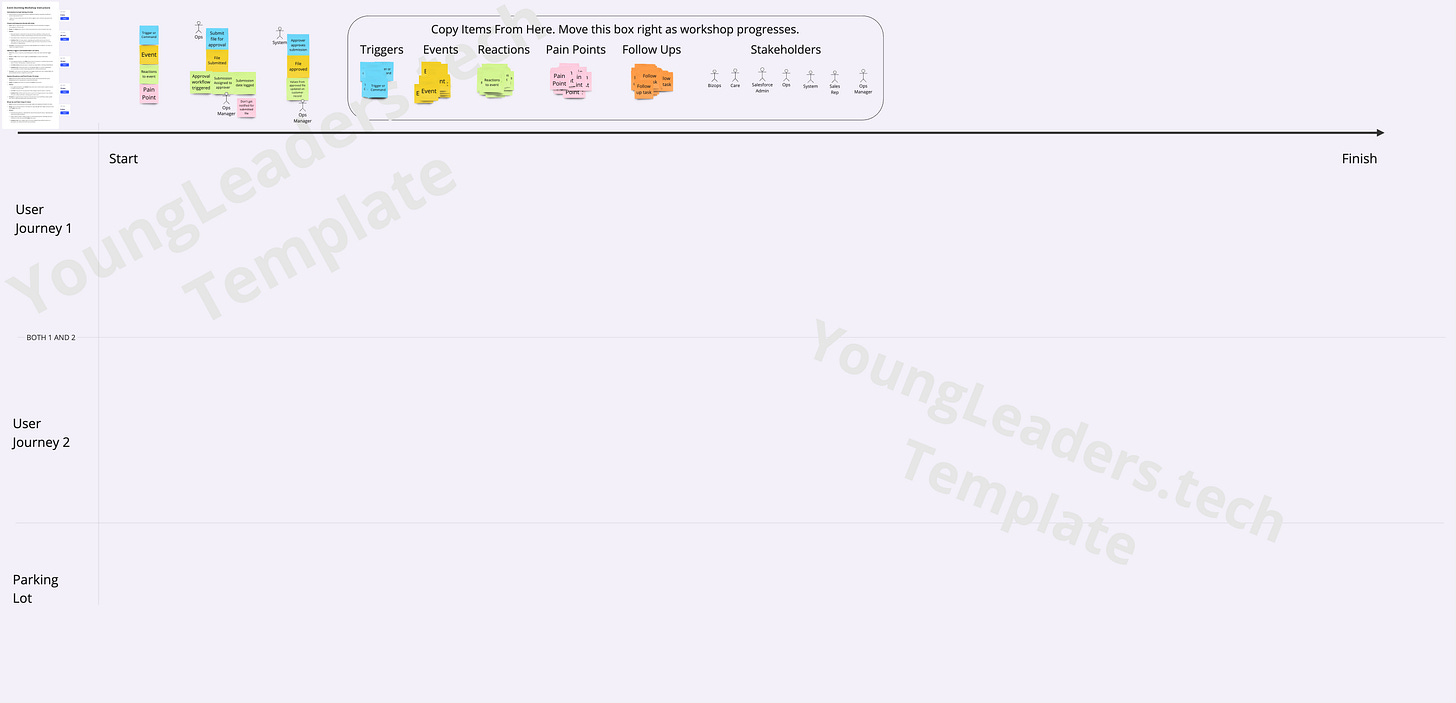
For this workshop, I recommend a digital whiteboard tool like Miro, allowing participants to collaborate in real-time. The setup I have here includes colour-coded sticky notes to differentiate between events, triggers, reactions, pain points, and follow-ups. I also use the stakeholder icons.
The template I’ve created is ideal for teams managing multiple journeys or workflows and aligns well with the customer journey map I’ve discussed before. If you need to account for more workflows, just add another row.
The rest of your board should be set up as follows:
Instructional Area (Top Section)
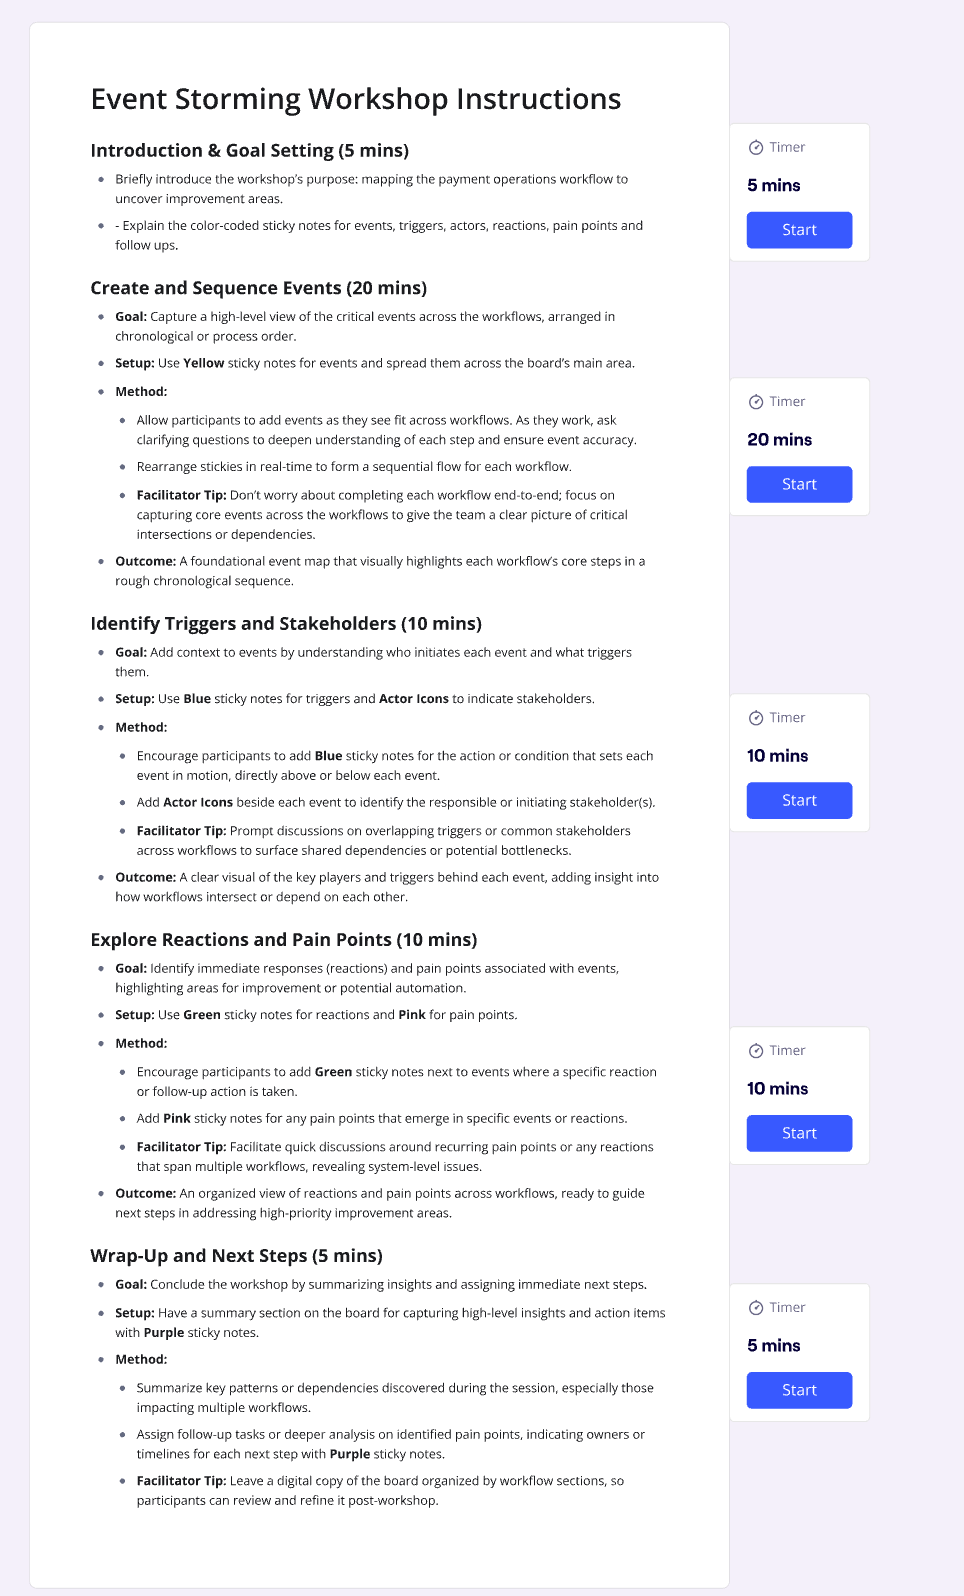
Workshop instructions and timers: Simply copy the instructions excerpt below and add it as a document on the board. You can add timers to each section so you can quickly move from one timer to the next
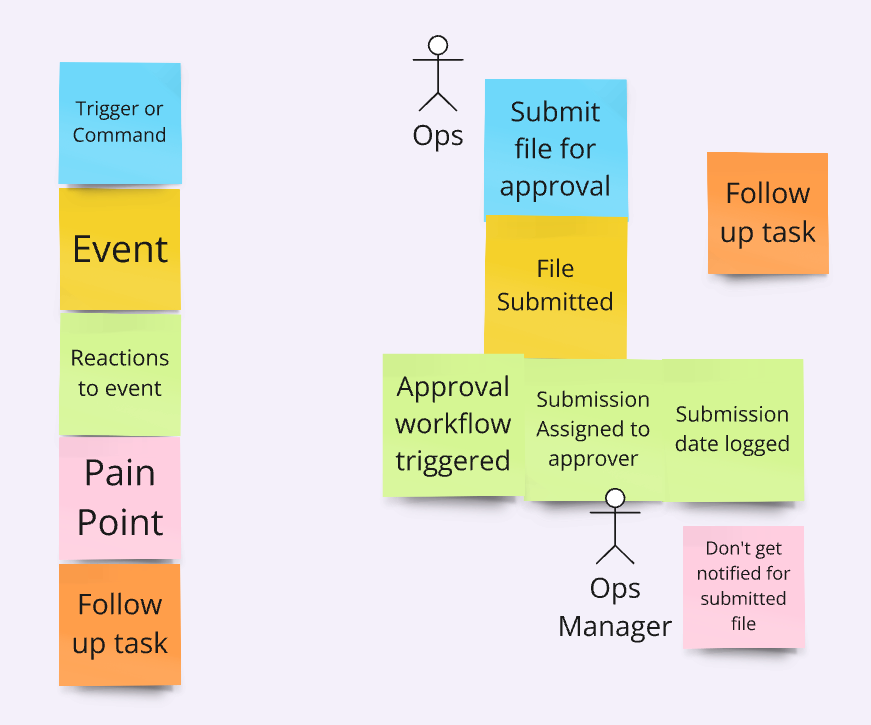
Sticky Legend: This is where you have example events, similar to what I have here. You should find some real events that you are confident look similar to the workflow you are investigating, to give the workshop members a good idea of what a correct event looks like.
Trigger Stickies: As I have on my template, this should be locked so nobody but you can move the title text. I group the frame and the titles together so I can move them in the workshop to follow along the board.
You might have to widen the board depending on how long the journey is, so having the icons just above the piece of the board you are focusing on is handy. Your triggers should follow the below colour scheme. This is the common colour scheme of event storming in general I believe.
Trigger or Command: Marked with Blue sticky notes for conditions or actions that initiate events.
Event: Marked with Yellow sticky notes to represent key steps in the workflow.
Reactions to Event: Marked with Green sticky notes for responses that follow an event.
Pain Points: Marked with Pink sticky notes to highlight challenges or areas needing improvement.
Follow up task: Marked with Orange sticky notes for actionable next steps or tasks arising from the discussion.
Stakeholders: Represented by icons or labels to indicate roles or individuals responsible for or affected by specific events.
Workflow Lanes (Main Area)
This is where you break up the board into swimlanes.
User Journey 1: A dedicated lane to map out the first user or stakeholder journey, including its start, finish, and the series of events, triggers, and reactions in between.
Shared Journey Lane (“Both 1 and 2”): A middle lane dedicated to capturing shared events, triggers, or dependencies that overlap between User Journey 1 and User Journey 2. This helps surface cross-functional insights or common pain points.
User Journey 2: A separate lane to map a second journey, allowing teams to explore a parallel or related workflow.
Parking Lot: A designated space for unrelated ideas, off-topic questions, or items that require follow-up later. This keeps the workshop focused while ensuring no valuable input is lost.
Workshop Breakdown and Instructions
Here is a short recording (~5 mins) of myself going through the board and giving some other tips to help make the workshop run more smoothly.
The below excerpt is what you are going to add to your Miro board where I have shown you above. You can simply copy the whole thing into the new documentation feature on miro, and lock it to your board.
Note: This layout below only lasted for about 15 minutes when I ran the last workshop. Once people got up to speed, we spent about 30 minutes creating, sequencing, adding triggers and reactions all at the same time.
This is totally fine.
The instructions shouldn’t be followed to the letter, as every workshop is different. The people and the topics are never the same in any two workshops, so you should adapt to the situation rather than forcing the structure down the same path. You’ll get better results that way.
Second Note: You should invite your dev team to the workshop, but ask them to remain quiet unless what they want to ask will help fill out the board. Since your stakeholder’s time is limited, you need to make sure that they have the majority of the speaking time.
You need their information first, so if your team has questions they can use the follow up stickies or the parking lot for more urgent topics. You can try tackle them in the meeting if time allows for it.
Event Storming Workshop Instructions
Introduction & Goal Setting (5 mins)
Briefly introduce the workshop’s purpose: mapping the payment operations workflow to uncover improvement areas.
Explain the colour-coded sticky notes for events, triggers, actors, reactions, pain points and follow ups.
Identify the start and end point of the workflows/customer journeys. You may not want to add stickies that are out of scope.
Create and Sequence Events (20 mins)
Goal: Capture a high-level view of the critical events across the workflows, arranged in chronological or process order.
Setup: Use Yellow sticky notes for events and spread them across the board’s main area.
Method:
Allow participants to add events as they see fit across workflows. As they work, ask clarifying questions to deepen understanding of each step and ensure event accuracy.
Rearrange stickies in real-time to form a sequential flow for each workflow.
Facilitator Tip: Don’t worry about completing each workflow end-to-end; focus on capturing core events across the workflows to give the team a clear picture of critical intersections or dependencies.
Outcome: A foundational event map that visually highlights each workflow’s core steps in a rough chronological sequence.
Identify Triggers and Stakeholders (10 mins)
Goal: Add context to events by understanding who initiates each event and what triggers them.
Setup: Use Blue sticky notes for triggers and Actor Icons to indicate stakeholders.
Method:
Encourage participants to add Blue sticky notes for the action or condition that sets each event in motion, directly above or below each event.
Add Actor Icons beside each event to identify the responsible or initiating stakeholder(s).
Facilitator Tip: Prompt discussions on overlapping triggers or common stakeholders across workflows to surface shared dependencies or potential bottlenecks.
Outcome: A clear visual of the key players and triggers behind each event, adding insight into how workflows intersect or depend on each other.
Explore Reactions and Pain Points (10 mins)
Goal: Identify immediate responses (reactions) and pain points associated with events, highlighting areas for improvement or potential automation.
Setup: Use Green sticky notes for reactions and Pink for pain points.
Method:
Encourage participants to add Green sticky notes next to events where a specific reaction or follow-up action is taken.
Add Pink sticky notes for any pain points that emerge in specific events or reactions.
Facilitator Tip: Facilitate quick discussions around recurring pain points or any reactions that span multiple workflows, revealing system-level issues.
Outcome: An organised view of reactions and pain points across workflows, ready to guide next steps in addressing high-priority improvement areas.
Wrap-Up and Next Steps (5 mins)
Goal: Conclude the workshop by summarising insights and assigning immediate next steps.
Setup: Have a summary section on the board for capturing high-level insights and action items with Purple sticky notes.
Method:
Summarise key patterns or dependencies discovered during the session, especially those impacting multiple workflows.
Assign follow-up tasks or deeper analysis on identified pain points, indicating owners or timelines for each next step with Purple sticky notes.
Facilitator Tip: Leave a digital copy of the board organised by workflow sections, so participants can review and refine it post-workshop.
Event storming is an incredibly versatile tool for product teams and operational stakeholders alike. It helps surface the “truth” of complex workflows by revealing pain points, dependencies, and misalignments across workstreams.
This workshop style not only fosters cross-functional alignment but also enables teams to quickly identify areas where targeted improvements can drive significant efficiency or user experience gains.
In my experience, an event storming workshop is particularly valuable when working across diverse workflows and stakeholders.
It provides a structured way to gather input from various perspectives and ensures that no critical step or challenge is overlooked.
Plus, it’s an engaging way to bring teams together, fostering a shared understanding of what’s really happening in a system—and where the biggest opportunities for improvement lie.
For More Tips
I have some other Product Operations content here if you found this useful.
For my past tips check out my past posts on Substack or check out the hashtag #JohnsTipOfTheWeek on LinkedIn.
I’d love if you subscribed! I’m trying to build a bit of a following to try and help folks in the industry and make their jobs a little bit easier.
Documents Mentioned Above


